


Today, I focused exclusively on the task of getting my Crypto Raiders compounding vault app ready for production. I’ve been working on it for a few weeks now and have run it through the paces on everything I can think of. It’s time to go-live. With that in mind, I spent most of the day polishing the app and finishing the deployment of infrastructure to host it.
App Components
Before I talk about what I did to get it ready, here is a quick overview of the various components of the app and their purpose:
- Raider LP Vault Contracts (2) - The on-chain component of the app. One for RAIDER/MATIC SLP tokens and one for AURUM/MATIC SLP tokens. Users deposits their SLP tokens in the vault contracts via the deposit function and can pull them out with the withdraw function.
- Frontend App - The browser interface designed to let general users interact with the vault contracts in a seamless way. The app is written in React and heavily leverages the BlueprintJS UI library and Ethers for smart contract interactions.
- MATIC Price Oracle - A combination of a scheduled Google Firebase Cloud Function and Realtime Database that pings an API for the current MATIC price, caches it, and provides it to the app. This is more performant than having the client call a public API, some of which have rate limiting.
- Manager Bot - An always-on Node.js service that schedules cron jobs to compound the vaults based on their set
compoundFrequencyand listens for Compounded events to check for new frequencies. The bot uses a Polygon node from Alchemy since it doesn’t receive an injected browser provider. - Development Environment and Scripts - While not a component of the deployed app, I have all of the components of this app within a Hardhat and Firebase development environment. There are a number of scripts that I run locally to compile, test, build, deploy, verify, and set parameters on the components. This tooling makes it possible for one or a small team of developers to create production-ready apps in a short amount of time.
Choosing a Hosting Provider
There are a ton of options for deploying a frontend application now. It can be overwhelming to even evaluate the options. Most of the major cloud providers have some kind of PaaS solution aimed at letting developers just deploy their code (AWS, Azure, Google). Additionally, there a number of specialized providers that focus specifically on certain frontend app flavors (React, Next.js, Gatsby.js, etc.) such as Vercel and Netlify. My challenge was identifying the simplest configuration to both deploy and manage the infrastructure.
I originally decided to use Vercel to deploy the Frontend React App. Vercel has a great UX and makes creating a new project simple by connecting your GitHub repository. It allows you to publish a new version automatically with each new commit. However, the backend services on the platform are more limited. They do have Serverless functions that you can deploy, but I needed a more traditional VM or container setup for my Manager Bot (this is a con with the design I ended up using, not a knock on their service).
As is probably clear from the overview, I ended up opting to host the all of the components together on the Google Cloud Platform. I have some past experience with it, and the management console + CLI is easy to use.
The final infrastructure setup is:
- Frontend App - Firebase Hosting
- Manager Bot - Standard VM + Alchemy Polygon Node
- MATIC Price Oracle - Firebase Cloud Function (Scheduled) + Realtime Database
The Firebase CLI made this easy to setup. After defining my simple function using their tutorials and setting up the database in the console, I executed some simple commands with the CLI to scaffold everything.
$ firebase login
$ firebase init functions
$ firebase init hosting
$ yarn build
$ firebase deploy
I'm glazing over the CLI selections, but, overall, it's straightforward. I can redeploy by building the app again and then running the deploy command.
Another useful feature of the Firebase CLI is the emulators. You can create local versions of your cloud assets to test your functions on so that you don't interfere with the production deployment. There is a nice UI in the on the local network to analyze logs and state. You just download the emulators after initiating the services and you're good to go.
$ firebase setup:emulators:<insert each service>
$ firebase emulators:start
After I finished getting all of this setup, I learned about railway.app, which looks like it would have been a good solution for my Manager Bot and other Serverless/Database needs in combination with Vercel. I plan to explore this for a future project.
Polishing the Frontend
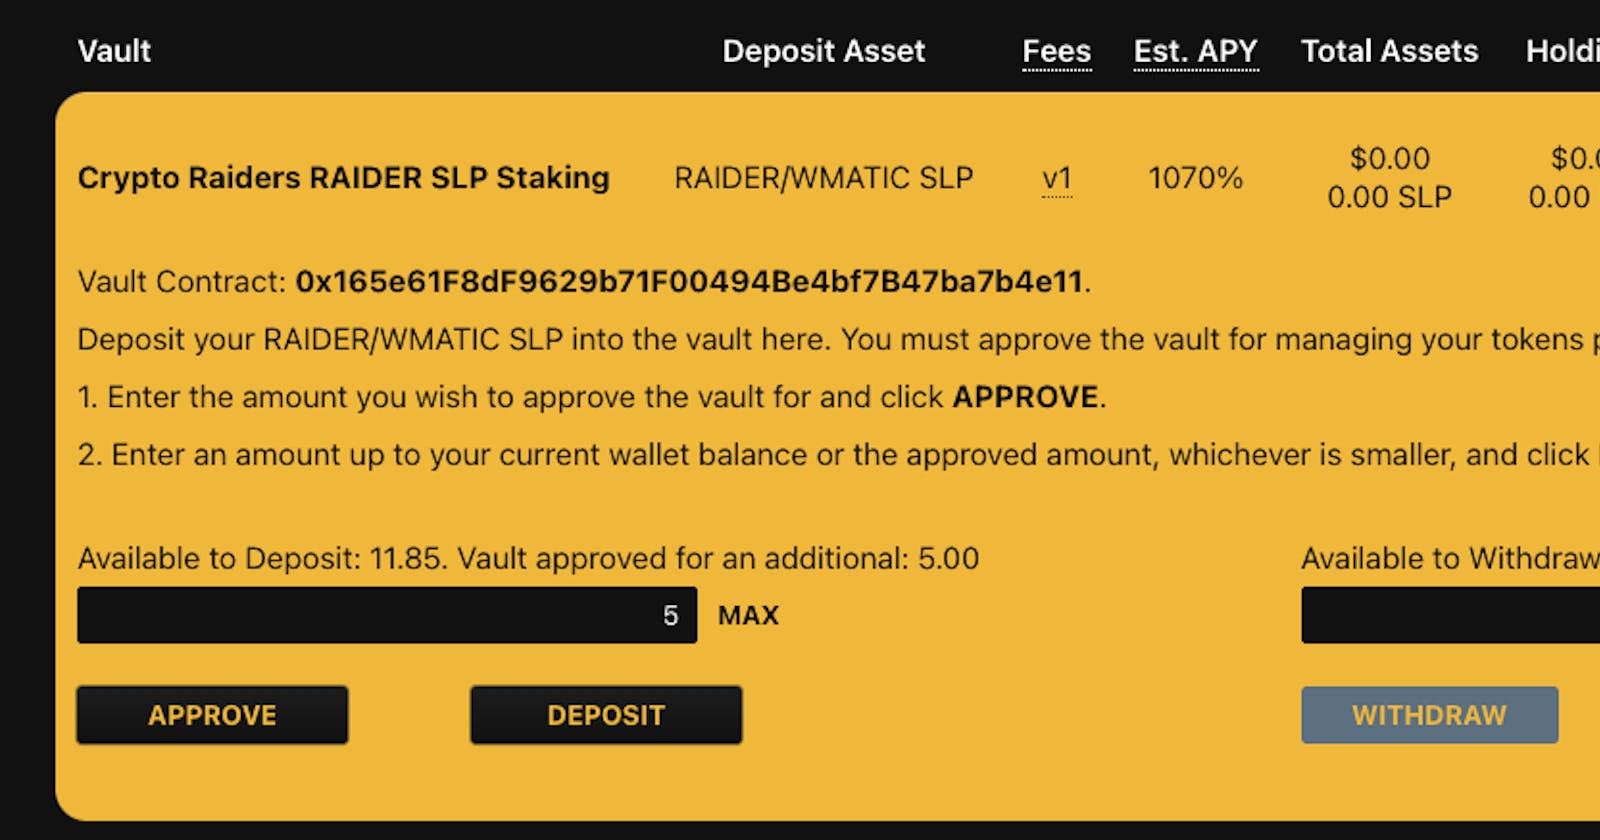
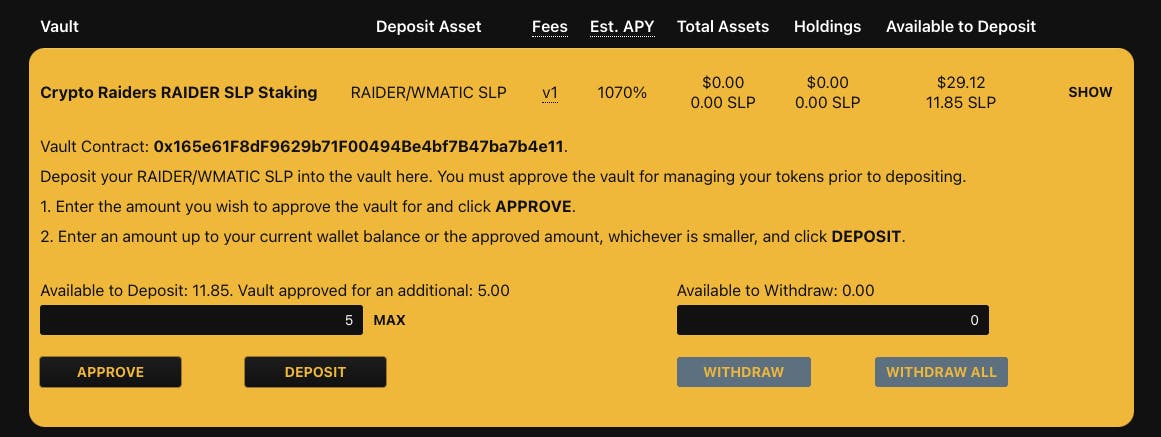
While writing the application, my main focus is on the layout and functionality that is required for the user to perform the intended actions on the app. I normally put in the content while building the layout, but this is a first draft. Getting production-ready requires polishing all of the text, tooltips, and user confirmations in the app. One of the main things I added was a modal to show confirmations or errors on user actions.


Additionally, I cleaned up the overall vault description and added tooltips to remove less immediately important information from the view.
Deploying the Contracts and Verifying on Polygonscan
Hardhat is an awesome development tool because abstracts the requirements to interact with different networks programmatically. It also has a great plugin ecosystem.
When deploying my contracts, I just used the same deploy.js script that I wrote for testing my app and pointed it at Polygon Mainnet, which I defined in my hardhat.config.js file. It worked great the first time and voila! my contracts were deployed.
$ npx hardhat run scripts/deploy.js --network polygon
After deploying the contracts, I found them on Polygonscan and wanted to verify them with the source code. Zakk did me a solid (let me google that for you) and pointed me to the @nomiclabs/hardhat-etherscan plugin which lets you do this directly from the hardhat CLI with an API key from the target networks blockchain explorer. After configuring the etherscan property in my hardhat.config.js file and file that exports the constructor arguments I used in the deployment, I simply ran this command:
$ npx hardhat verify --network polygon --constructor-args constructorArguments.js <contract-address>
Again, it worked the first time. Maybe I need to try something harder?
Overall, building this application has been a ton of fun. I've learned a lot about Solidity, Web3, and what it takes to build production-ready apps.